Are you looking for a way to get into gardening, but don’t have the space for a traditional garden? If you’re new to container gardening, don’t worry – it’s easy to get started and you can still harvest a bounty of fresh fruits and vegetables from a small patio garden.
By following these simple tips, you’ll be able to create a thriving container garden in no time. Plus, you’ll get all the benefits of spending time outdoors in your own backyard.
In this post, we’ll discuss the basics of container gardening and provide tips for getting a successful harvest from your patio garden. Let’s get started.
Affiliate Disclosure: Some of the links in this post are affiliate links. This means that if you click on the link and purchase an item, I will receive a commission at no extra cost to you. I only recommend stuff I love and would recommend to a friend.
What is container gardening and what are its benefits?
Container gardening is a type of gardening that can be done in a small space, such as a patio. It is also a great way to get started in gardening if you don’t have a lot of experience.
The benefits of container gardening include being able to control the soil, water, and pests more easily. You can also choose the size and shape of your containers, which gives you more flexibility in terms of design.
And since the plants are contained, they are less likely to spread out and take over your yard or patio. In a more traditional garden, weeds can overtake your yard in a couple of days flat without regular maintenance.
Selecting containers for your garden space
Containers for gardening come in all kinds of shapes and sizes. Depending on your available space, you may want to consider your options at length before jumping in and buying something.
 Pin
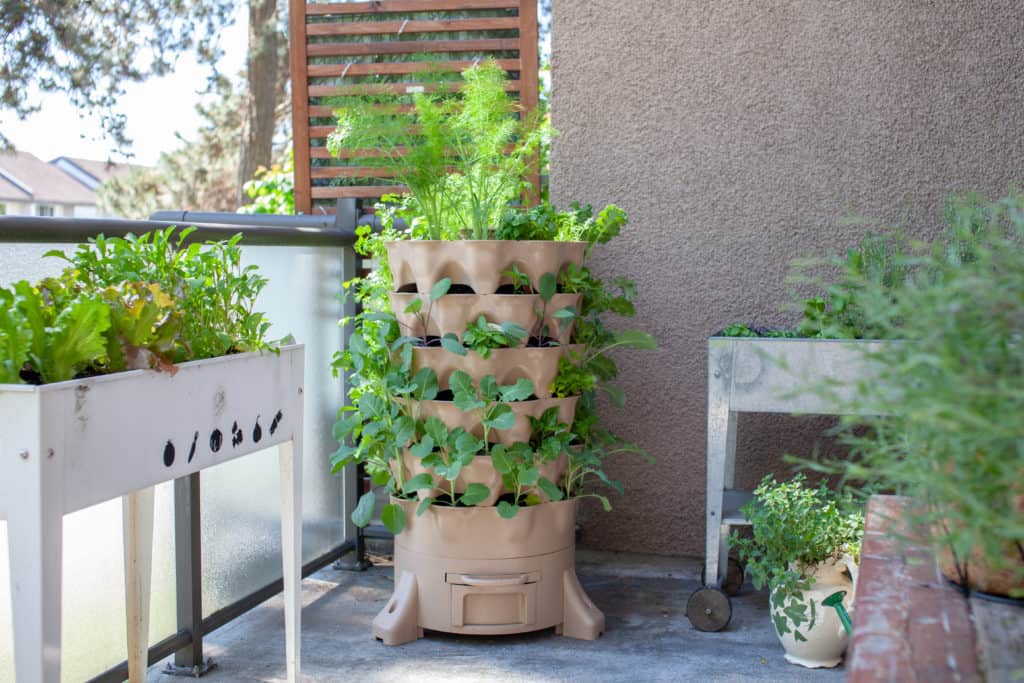
PinVertical garden towers
These are some of the most effective types of planters for small spaces because of the sheer amount that you can grow in them in that same square footage as a regular garden bed. Even people with large plots of land to farm enjoy having vertical gardening towers to plant in because of how efficient they are. You can plant all kinds of stuff in them, too. Greens, herbs, flowers, strawberries – so many possibilities with these.
GreenStalk vertical planters are well-known in the gardening community because they’re great quality, super-efficient, and are big enough to grow many types of vegetables and herbs in them. They also sell accessories for their planters, like these planter movers with wheels so that you can easily rearrange your container garden or rotate your planters. If the GreenStalk is not in your budget, check out these smaller vertical planters to start with for now.
Grow bags
Grow bags aren’t as efficient as vertical towers, but they’re also not as costly and easier to move around if you need to. You can get a pack of grow bags for relatively cheap and grow quite a bit of food in them. This is how I originally started with my first container garden and I still use those grow bags today.
To grow tomatoes, you’ll want to look at 7-10 gallon grow bags for each plant. For peppers, you’ll want at least a 3-gallon container. For something like a squash (which you can grow on a balcony if you trellis it vertically), you’re looking at a bigger container, around 20 gallons. Some herbs can do well in 1-gallon containers.
Moral of the story is? You can grow a lot in grow bags and they’re pretty inexpensive. Just make sure to look up how much space your plant will need before planting it in too small of a container.
Raised beds and other planters
Adding a good old raised bed or large plant pot/planter to your container garden is never a bad idea. But they do carry a heftier price point than grow bags do and they don’t usually stack up to vertical garden towers in terms of production. Be sure to check out your local thrift store or re-store for large planters that would be perfect for a container garden.
A raised bed that is several feet off the ground is also the best option for anyone who has trouble bending over to tend to their plants. Some raised beds come with wheels to move them around easier or a little shelf to store all your gardening paraphernalia, so that’s some added utility you might appreciate in your garden.
Bring in the soil
Adding good-quality soil to a garden is usually a gardener’s biggest expense, especially in the first year of gardening. You can always amend your soil later on if you do end up with lower-quality dirt in the beginning. Any bagged soil labeled “raised bed soil” or “potting soil” will generally be a good fit for a container garden.
The soil in a container garden needs a drainage-boosting component to be resistant to compacting, whether the soil comes with that already mixed in or whether you mix it yourself.
Perlite and vermiculite are an example of drainage-boosting soil components. If you plant in containers without having good drainage, you’ll risk the soil compacting together so much that the plant roots get strangled and start to rot.
Something like this potting soil from Walmart already has some of that mixed in, whereas this garden soil from the same brand does not. You can also purchase bags of perlite pretty inexpensively to mix into any soil you already have to make it more suitable for container gardening.
Choosing the right plants for your container garden
Patio or container gardening is a great way to enjoy all the benefits of gardening without having a lot of space. Container gardening is also a great way to get started with gardening if you are new to it.
But one of the challenges of patio gardening is choosing the right plants for your containers. You want plants that will thrive in the limited space and soil of a container, as well as plants that will complement each other in terms of color, texture, and growth habits. Here are a few tips to help you choose the right plants for your patio garden.
Think about what kind of look you are going for in your garden. Do you want a more formal look, with straight lines and symmetrical plantings? Or do you prefer a more relaxed, natural look with plants cascading down the side of your containers? Does it not matter at all and you’re just growing for food production and saving the bees? Once you have an idea of the overall style you are going for, you can start to narrow down your plant choices.
Consider the climate conditions in your area. If you live in an area with hot summers and cold winters, you must choose plants that can tolerate both extremes. If you live in a more moderate climate, you have more flexibility in plant selection. Get familiar with your growing zone but also get familiar with the first and last frost dates in your area, because there can be a lot of variety even within the same gardening zone.
Think about the amount of sun and shade your container garden will receive. Most plants need at least six hours of direct sun per day to thrive, but there are a few shade-tolerant plants that can be included in a container garden. Many seed suppliers have a section on their website for shade-tolerant plants and veggies.
Finally, buy your seeds from reputable sources. You want to get as many of your seeds as you can from seed suppliers with a good reputation and who have some skin in the game. If you buy some seeds from a random Etsy store with 3 reviews, you can’t be sure you’ll get a decent harvest for all your hard work. Some have seeds available from Amazon, but you can usually get a lot more information and even save some money by buying them directly from the company. Here are some seed suppliers I use and recommend.
- True Leaf Market is a great place to source seeds and even to buy in bulk for things like microgreen seeds. This is a great company to buy from once you’ve found your favorite veggies, herbs, microgreens, and flowers and you want to save money by buying larger quantities.
- MI Gardener is an amazing place to get started with your garden. They send to sell out pretty quickly but they have seeds for $2 per pack, comparable to Walmart prices but better quality.
- Baker Creek (rareseeds.com) is classic and very popular in the gardening community. They’ve got some unique seeds over there that you may not find in other places.
- Hoss Tools sells awesome seeds including a few hybrid varieties I’m dying to try out. Their YouTube channel is very informative and helpful for me as an intermediate-level gardener.
Once you have chosen your plants, it’s time to get planting!
Grab some seed starting trays to get your seeds going easily. I love these Bootstrap farmer trays that are super sturdy compared to some of the other options. I’d recommend getting the 2-pack to start out with unless you’re growing in a larger area than a balcony or patio, in which case the 5-pack would be a good place to start. You can also check the price on these seed starting trays on Amazon, but they are usually less directly from the site.
How to water and fertilize your plants
 Pin
PinOne of the most important things to consider when gardening in a small space is how you will water and fertilize your plants. Both need to be done carefully in order to avoid damaging your plants or flooding your space.
When watering, it’s best to use a slow drip or mist setting on your hose or watering can. This will help prevent water from pooling on the leaves or around the roots, which can lead to rot or fungal growth.
If you’ve got seed starting trays, many of them allow for bottom watering which is a great idea because it also reduces the chance of damaging tender seedlings while watering them and ensures that the roots actually receive the water.
When fertilizing, it’s important to use a high-quality fertilizer that is appropriate for the type of plants you are growing. Over-fertilizing can burn roots and leave plants vulnerable to pests and disease. I like to feed my plants starting a few weeks after the seeds pop up.
- If you’re interested in organic gardening, fish emulsion fertilizer is organic and relatively inexpensive. Mix with water and feed plants 1-2x per week depending on your situation. It is kind of stinky, as a warning! Worm tea concentrate is another great way to boost your plant’s vitality organically.
- Non-organic fertilizers tend to be less expensive and they are also a good option. It all depends on your preferences and budget restrictions. Walmart sells a pretty inexpensive tomato and vegetable fertilizer that provides essential needs to your plants.
With a little care and attention, though, you can ensure that your plants stay healthy and thrive in a small space garden.
Protecting your container garden plants from pests and diseases
Gardening in a small space can present some unique challenges, but it can also be immensely rewarding. One of the key considerations is protecting your plants from pests and diseases.
Container gardens are particularly susceptible to problems since the plants are confined in a small area. However, there are a few simple steps you can take to help keep your garden healthy.
- First, choose plants that are resistant to common pests and diseases. Look for seeds that have resistances to pest pressure and plant diseases that are common in your area. As an example, the Tachi tomato is a good hybrid substitute for other paste-type tomatoes (like Roma or Amish Paste) if you’re having trouble with pests or diseases on them. If you’re unsure about what disease issues are common locally, I’d recommend reaching out to your local state extension site to ask or to join some local gardening groups on Facebook or in person to ask the questions you have.
- Second, regularly inspect your plants for signs of trouble. If you see leaf miners on your plants, get rid of those by squishing the leaves or removing them and disposing of them. Check the undersides of your plant leaves for eggs that belong to common pests, like tomato hornworms or squash vine borers. Staying on top of things and doing checks multiple times per week of signs of pest pressure will go a long way to making sure you get a good harvest from your small space garden, where every plant counts.
- Third, take immediate action if you do spot a problem. Avoid putting it off until later if at all possible. Pests and diseases are much easier to combat if you spring into action as soon as you spot a potential issue beginning.
By following these guidelines, you can help ensure that your container garden thrives for years to come and that you’re able to stay on top of pest and disease issues in your container garden.
Harvesting your container garden crops
Gardening in a small space can be a bit of a challenge, but it’s definitely possible to grow a bountiful harvest in a container garden. When it comes time to harvest your crops, there are a few things to keep in mind.
 Pin
PinCheck the plants regularly for ripe fruit or vegetables
If you wait too long, the produce may rot or become overgrown.
Some plants, like zucchini, for example, grow so quickly that if you leave them on the plant for one day longer than it needs to be, they can grow way too large and the taste will be negatively affected.
Once your plants start fruiting, do some research on those plants to find out how large you should allow the fruits to get before harvesting.
Cucumbers and squash tend to taste better when they are younger and smaller, but this isn’t the case for every kind of cucumber or squash. So it’s always best to check the specifics for the exact kind of seed that you planted!
Be careful not to damage the plant when you’re picking the produce and choose the right tool for the job.
Choosing the right tools and taking good care of them (not letting them get rusted, etc.) will help you improve the quality of your harvest.
For each new harvest, I recommend watching a video or two on exactly how to harvest the plant if you’re new to that variety.
Some plants don’t mind having fruit pulled directly off the stem by hand. Some plants will hate that and prefer that you snip off the fruits with a knife or scissors.
Before you harvest, make sure you have a plan for how to store that harvest so it doesn’t go to waste
 Pin
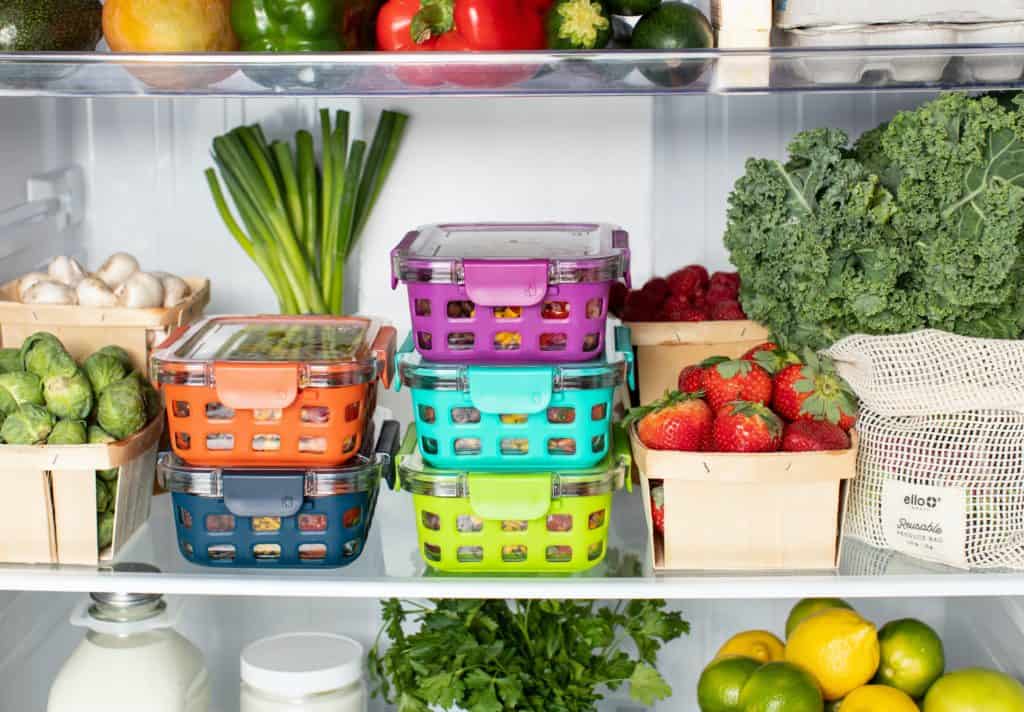
PinWhen you have a bountiful harvest, it’s important to have a plan for how to store all of that produce so it doesn’t go to waste.
Start by cleaning your fruits and vegetables thoroughly and then drying them completely.
Next, choose an appropriate storage container. For example, hardier vegetables like carrots or potatoes can be stored in a cool, dark place in an open container, while more delicate items like berries or herbs should be stored in the refrigerator in sealed containers.
You can also cut up veggies like carrots and celery and stick them in a mason jar full of water in the fridge. Lettuce, kale, and herbs can be kept crispy by adding them to a glass of water (like a vase with flowers) and setting them in your fridge.
Once your produce is properly stored, check on it regularly and use it up before it starts to spoil. With a little planning, you can avoid having food rot on the counter or in the fridge, which is always a bummer.
You don’t need a huge space to start gardening and growing your own food
 Pin
PinSmall-space container gardening can be a challenge because you’re working with such limited space to grow in, but you’d be surprised at how much food you can grow in an apartment or on a balcony. Especially after you’ve given it a try a couple of years in a row! A little gardening experience goes a long way.
Many seed companies have small space gardening tips and you can usually find container gardening seed collections on their site. These are a great way to find seeds that will work out in smaller spaces.
I hope you’ve found some value in these tips for container gardening for beginners! Good luck with your container garden and let me know in the comments what you’re trying to grow this year. I have some peppers, some determinate tomatoes, some cucumbers, and some bush beans growing in mine.
More gardening content:
- 6 of the Easiest Herbs You Can Grow in Your Garden (And Why you Should!)
- How to Start Composting at Home for Beginners: Everything You Need to Know
- 4 Incredible and Useful Pollinator-Friendly Plants for your Garden
 Pin
Pin
